Tuesday, January 7, 2014

Organizing My Spices


You'd think I'm crazy to get this much pleasure out of organizing my spices, but it's true! I'm giddy with satisfaction and pleasure at viewing all the little powders and dried things tucked away, each in their own matching jars. It has been a long time coming.

There are so many ways to handle the kitchen spices. When I was younger, spices mostly came in little tin boxes, red and white with the Schilling brand stamped on them. We had them stacked like tiny books in a lower kitchen cupboard. Their snap tops were plastic and had a scooping side and a shaker side. If you went back a little further in years, the tops were also tin, and they slid back and forth over an oval hole in the top of the can. This more ancient style resided in my grandmother's cupboard, who probably never heard of spices getting old and probably wouldn't have been able to bear to throw them away if she had. The tin boxes were great for keeping light out, good for keeping moisture out and easy to line up on a shelf. It was a drawback to not be able to see how much was left though, or to know what might be inside without actually reading the can.

Eventually, we went to keeping the spices in a shallow drawer, which worked very well. I used that method when I got my own house. Except by now, more and more spices were coming in an assortment of plastic bottles. I bought the bottles based on whether they would fit in my spice drawer. I laid the tall ones down, I Sharpied the names on the red lids of the small bottles and set them upright. Bulk spices started to become available. As I repurposed bottles, I had to cross out one name and write another. It sort of became a jumble with older ingredients at the back of the drawer where they weren't easily in view.

At my new house, I didn't have a drawer I could give over to the spices, so I used a basket in a lower cupboard. Finally, I'd had enough of that pile of old and new mismatched bottles piled up in the plastic basket and started looking for a new way. I looked through Amazon for glass spice bottles. I didn't want the staining and odor retention of plastic anymore.

When I came across Ball brand 4 oz jars with a standard size lid opening, something I had not known existed, I knew I'd found exactly what I wanted! They happened to be available at Walmart, and for only a little more than a dollar a jar. These came with a plastic lid with a snap shaker top incorporated, though I could have gotten some at Target with the regular style lids. The standard lid size was important to me, and I was vindicated when I saw that one of my plastic lids was broken, and I had to dig out a standard canning lid to cap my mulling spices. (I had dropped one of the boxes of four jars and suspect that was when it happened.)


I jumped in all the way and bought over two dozen of them. I wanted enough for all my herbs and spices. And I know where to get more!


These jars stack in my basket perfectly, and I keep them in the lower cupboard where light can't get to them.

I love to use canning jars for lots of things. In all their sizes and shapes they are good for left-overs, making tea, storing pantry ingredients, sending Kefir in someone's lunch kit, and now, finally, a size perfect for spices and herbs!


Saturday, December 28, 2013

Things That Don't Go Together (or do they?)

I first heard the word "fusion" only a year ago, in regards to combining food elements from completely different cultures and styles into some chimera of a comestible. Maybe it's the sort of thing people have been doing before, but maybe only by accident. "Whoa! We were going to have tacos tonight, but all I have in the meat drawer is italian sausage! And soy sauce! And tzatziki! Maybe a little fenugreek will tie it all together...

When I was younger, everybody had definite ideas about what went together, and what did not. I remember the horror of even thinking that you would wear anything pink in the vicinity of anything red. They were like matter and anti-matter. If you were wearing a pink dress and tied a red apron on, the world would end. Or everyone would look at you and whisper, which might have been the same thing. The same thing went with wearing plaid and stripes. Or stripes and polka-dots. Or polka-dots and plaid. You get the picture.

What I didn't realize at the time was that it was not an absolute truth that certain things didn't go together. It was only the current culture and ideas, and the fashion and food industry that told us what matched and what didn't.

One time I went to my Grandma's house wearing a pretty blouse that was a mix of blues and greens, rich and saturated in color. She could hardly stand to look at it and told me that she was used to those two colors not going together. I remember thinking to myself, maybe back in the old days, NOTHING went with anything else! Hmm! That was about the time my world was rocked when my mom came home with a dress from the mall (sidewalk sale, of course) that had been sewn, ON PURPOSE, with red and with pink polyester double-knit material. Times were a'changing.

When I consider two surprising ingredients that pop up in the same food item, chocolate bars and chile come to mind. Sweet, rich, creamy chocolate candy and spicy, mexican chiles? It doesn't sound nice, not when we are used to dessert ingredients like caramel, raisins, nuts, marshmallow and toffee riding along with the chocolate. But it does go together, in a strange exotic way. How adventurous and clever! you think. What imagination! Until you remember that the Aztecs originally paired chocolate with chiles, and then the Europeans took it and made something totally different with it that we are familiar with today.

Speaking of chocolate, what is this thing with dressing it with salt? Big salt crystals. Or shaking enough salt in the cocoa so you can taste it? The first time it was interesting. The second time was, well, enough. I guess the problem for me is that the difference between just enough salt to be a nice little savory note, and too much is very slim for me.

When we go wine tasting, often a dark chocolate chip is set before me when I'm about to try a rich dark cabernet, or perhaps a port. I used to oblige. Eat it and then nod, yes, dark chocolate does go with this. Yes! I have finally found the perfect drink to go with my dark chocolate M&Ms! No longer do I have to be content with washing them down with milk, or, heaven forbid, hot coffee! A sip of port, an M&M, a sip of port, an M&M! Hmmm, Nah! Forget the candy, give me a thick medium rare T-bone beefsteak to go with my cab. I bet they would sell a lot more wine if they set a platter of prime rib on the counter.

When it comes to jewelry, I'm partial to gold, or rather gold-colored gold. Silver is nice too, and affordable. I never could think of why they made "white gold." Who would know it was gold if it wasn't GOLD? Why not just use silver? Or an alloy? I met one woman who liked white gold so much, she had some perfectly good pieces plated with white gold. She was complaining about some spots where the white was wearing off to show the gold-gold underneath. But then I met my husband, who liked white better than gold gold. And worse than that, he liked the look of the two mixed in one piece of jewelry. That just doesn't work for me, though I do like the look of Black Hills Gold, IF they don't put silver color into the mix!

I like to think that some day I'll be creative and put a few food items together that no one has thought of doing yet, like some one did with spicy, tangy Buffalo wings and Blue Cheese, and become famous. But people are more adventurous now, and it seems like most things have been tried. But you never know. Everytime someone pronounces that everything has been invented, a new dimension of invention is at the edge of the horizen.

Monday, November 18, 2013

Kale chips!

Hi - this is the sometimes-seen-daugher of the food adventurer, doing a guest post today!  I've had some requests for the kale chip recipe I've been experimenting, so here it is!

When was the last time YOU ate an entire bundle of kale in one sitting?

Yeah, me either.....until I discovered home made kale chips!!!!

It took me a couple tries to perfect my recipe.  There's a couple of pitfalls that the recipes on the the internet didn't bother mentioning, so the point of this post is NOT to show pretty pictures of kale and the resulting chips, but to help you make delicious kale chips on the first batch, instead of the third. 

My advice is to perfect the basic recipe and then move on to variations.

The recipe is really simple.

Step one: have in your possession a clump of kale
- I shop at Winco since I am broke, poor, grad student who has to convince her non-vegetable eating boyfriend to buy kale.  So, this recipe uses the amount of kale that is twisty-tied together and sold at Winco.  Maybe eight leaves or so?  Enough that when I tear the leaves off of the tough stems it mostly fills my huge glass mixing bowl and is a *little* too much to spread single layer over my full size cookie sheet.

Step two: tear the leaves off the incredibly tough (and bitter stems).  Or not.
- The first recipe I used said to tear leaves into potato chip sized pieces.  DO NOT DO THIS.  The size of your leaves is the first PITFALL. What happens when you roast kale is that it shrinks DRAMATICALLY. And for some reason, the smaller the pieces, the more oily and salty they taste.  The kale that comes prechopped in a bag IS TOO SMALL. Trust me.  You will be disappointing.  Tearing the leaves off the stems, leaving them in as big of pieces as possible seems to produce perfectly sized chips on the other side of the roasting process. What about roasting whole leaves? I've seen several recipes suggest this.  I haven't tried it, but I'm skeptical for a couple of reasons.  After roasting the leaves are very brittle and shatter with handling.  The result of tearing out the stems produces bit size chips after roasting.  Whole leaves would require several bites to eat, and might result in crumbs of kale everywhere.  Also, because there is more moisture in the stems, it might require the leaves to be roasted longer in order to dry the stems, which might result in the leaves becoming over roasted.  The last reason I'm hesitant to try whole leaves is how well I can coat with my flavorings and oil.  The chunks of leaves toss in a bowl nicely.  Whole leaves might be a little more difficult to toss and coat evenly. Try it both ways and see what you prefer.

Step three: Toss in a bowl with 2 tablespoons oil
- I've been using olive oil.  Conceivably coconut oil would work - but this time of the year mine is solid at room temperature and I'm too lazy to heat it up.  I toss the kale in a big bowl after drizzling with the oil. DO NOT ADD TOO MUCH OIL. This is pitfall number 2.  It's incredibly easy to over oil the kale - it won't look like there's much oil on the fresh greens, but post roasting you will be SHOCKED.  The leaves shrink, the oil consolidates into a smaller space.  Think about it this way.  This recipe makes 1-2 servings of kale chips.  I find that 1-2 tablespoons of oil on a big bowl of popcorn is about right.  1-2 tablespoons of oil in any recipe is about my max for a single serving of something or it gets too oily.  So trust me here and MEASURE the oil and do NOT add another squirt "just because".

Step four: spread on a cookie sheet
Single layer - use a second sheet if necessary.  Most of the time, one "bunch" of kale is a full cookie sheet, or just over one cookie sheet.


Step five: sprinkle with salt
Error on the side of UNDER salting.  This is pitfall number 3. One recipe I tried suggested 1/2 tsp of salt to be tossed with the kale during the oiling step.  MISTAKE.  Had to throw away the batch because it was inedible. LIGHTLY sprinkle the cookie sheet kale with salt.  You can always add more later.  If I had to estimate the salt, it would be 1/4 tsp or so for an entire batch.  The end result is PLENTY salty for me :)

Step 6: Bake in a 275 degree oven until crispy and dried. Usually 15-20 min.  
Check half way through and separate overlapping leaves about half way through.

Step 7: remove and store
I usually end up eating the chips the next day for some reason.  I've stored in a bowl on the counter, or in a paper lunch sack and both were great - I live in a low humidity area (central CA) and the leaves stayed perfectly crispy the next day.

Here's the problem with the basic recipe.  I'm a super taster.  I'm very very sensitive to bitter flavors.  These chips have a WONDERFUL and ADDICTING mouth feel to them.  But at the tail end of the chew, right before the swallow when the chip has disinegrated onto my tongue and is coating it... I get a flash of bitterness that I find unpleasant. So, I knew I wanted to experiment with some variations that might help hide that flash of bitter.

Here's my favorite so far:

Bacon Maple Glazed Kale Chips

- Fry 2 pieces of bacon in a skillet.  Remove strips, save grease.  See the comment above about Winco and my poor-ness - my cheap thick bacon yeilds about 1 tablespoon of grease per slice.
- chop bacon into little pieces and toss with the kale that was prepared (stems removed etc) like the previous recipe.
- Toss with 2 tablespoons of bacon grease (replaces the olive oil)
- Toss with 1 tablespoon of real maple syrup
- Spread on a cookie sheet
- I do NOT add salt - I find that the bacon provides plenty.
- bake as above.

I found that I needed to bake it longer - the maple syrup puts more moisture on the kale and has to reduce down to get the same level of "crunch".  The first time I made this recipe I panicked at the end of cooking because the leaves still seemed really damp and wet at the end of cooking....but the leaves were on the verge of being over cooked. I went ahead and removed it from the oven and put the chips in the bowl, and realized the "wetness" was just because of the hot melted sugar - as the chips cooled, so did the sugar in the maple syrup.  The leaves/chips were already crisped, and as the syrup cooled it dried nicely too - and the chips ended up perfect :). Not wet or sticky at all, just slightly sweet, not too greasy.

Other variations that are on my list to try are:
- cinnamon sugar
- Ranch
- honey mustard
- tahini
- salt and viinegar

I think you could do anything with these chips that you would do with popcorn - dill flavor etc. :)

Thursday, November 7, 2013

Edible Food-Like Products

We get so used to thinking that the familiar goodies we pop into our mouths are really food, just because they have flavor and fill us up, that we forget-- they are not food. I like the term I heard once, "Edible Food-like products. I ran into one of those the other day, and it jumped into my grocery bag. Or it might have not, I dont remember much about the event. I only have a foggy impression of eating a few samples from a dish at the check out counter at World Market, and then I was walking out the door with the bag of Churro Nuggets in my sack. I vaguely remember a half off sticker on the bag, which might have helped.

After I crunched down on one of those, well, crunch things, I swear I could literally feel dopamine trickling over the pleasure centers of my brain. The lady before me had spilled about a cup of them on the sale ads beside the sample dish. It's only polite to take one or two from a dish of samples, but the ones on the newspaper were fair game. I felt like a dog wolfing up the salami someone spilled from their plate, trying to get it all before someone cleaned it up. I felt like snarling, "Slow down! Give me some time!" to the clerk who was holding out her hand for my money. That was probably the point I threw the bag of Churro Nuggets out for her to ring up for me.

Can I describe them? Sort of like caramel corn, sort of like Cheetos. Sort of like that fried cinnamon flavor of churros. And about the size of the end of my thumb. And what is in these golden bites? One of the descriptions printed in a red exploding star says, 100% puffed corn. I'm surprised the food police don't make them use a black Sharpie on that. The other red star, beside the ribbon that says "World Famous" says, intriguingly, "secret recipe." The secret must be in the cooking of them (fry, dip in cinnamon sugar, fry again?) because the ingredient list is directly below.

Sugar, corn, corn syrup, canola oil, molasses.

And then the plethora of chemicals, etc, that make up the other 2%.

Salt, margarine, (which has its own ingredient list a mile long) soy lecithin, soybean oil, propylene glycol, natural butter flavor (which means it is unnatural or they wouldn't have felt like they had to say that) natural maple flavor (ditto) caramel color (which sounds ok only because of the word "caramel") cinnamon powder, natural and artificial flavor (someday do some research into the world of flavorings) and beta carotene.

Eating these things is the closest I have felt to the way a smoker must feel about his cigs. I hate them! I must have another! I should throw what's left away. But then I pull out "just one," and it's over. The only good thing about them, I think, is that they go great with a banana.

As a comparison, I have photographed a package of a "food" snack beside the EFLP. (Edible food-like product) I like Corn Nuts. They are crunchy and bite-sized. I like to suck the salt off one, softening it in my mouth, nibbling the little kernel out, scraping what's left with my teeth, and then finishing it off. Then I might eat another one. A bag might last me awhile. Unless it has spicy fake cheese flavor on it. Then might eat more of them. But I would NEVER scrape them off the newspapers on the check out counter gobbling them up before I got kicked down to the bagging end of the line.

As for the ingredient list, it is: corn, corn oil, and salt. And when I look at them, I can see what they used to be in real life. That's kind of nice.

And no exploding red stars.


Sunday, November 3, 2013

Presto! A Shower!

Maybe not extremely interesting a post for me being gone so long, but quite exciting for me. The house we have came with one shower, and one tub. The tub looked like a good start for making it into a shower also, but I wanted to do it quick and I expensively, and not have to get inside any walls looking for the back door to the tub fixtures.

I researched and discovered that I could replace my tub nozzle, which screwed off, with one that had an outlet for a hand held device. After that, we just had to mount a holder for the hand held wand up on the wall behind the shower.

I looked for some panels that I liked but just couldn't find what I wanted at a price I wanted to pay. Plus, just thinking about the effort to put them up nicely made me tired. I knew that I would be the only regular user, so I could afford to have a system that needn't hold up to hard useage. The wall was covered with wallpaper, vinyl coated, like most modern wallpapers are now. But it was applied in an odd way. To mimic the look of stone, pieces were torn and then applied like collage. I thought that if I could come up with some sort of heavy, clear, waterproof product, I could paint it on and that would work. I hunted back through my past life and remembered how we made pictures in 8th grade art class using Mod Podge. And I knew it was still available.

When I looked in the arts and crafts store, I found they had an outdoor version. I knew that would be the most waterproof of all, so I bought a jar and some wide craft brushes. It was stiffer and gookier that I had anticipated, a lot like dried-out glue, but it went on ok. I needed exactly 2 bottles of it to put on two coat.

I let it dry for a day, and it worked! I just gently towel it dry after use it, to keep any soap scum or water deposited from building up. Since the shower wand is so downward direct, not that much water gets up on the wall anyway. One of the pictures shows the shiny edge that marks the beginning of the shower area.

You can see the edge of the curved rod we installed.

I Love it!

Thursday, June 20, 2013

Amazing Discovery!

Civil Engineer Creates  Amazing Labor-Saving Idea!

(Special Advertising Section)

Housewives everywhere have been quietly following this new and innovative trend, and now
YOU CAN TOO!


MIRACLE IDEA! Say goodbye to tedious hours of housework spent on rug cleaning! Long-use HEPA filters were a good idea in their time, for saving money over disposable bags and clearing the dust from the air, but as housewives and housekeepers quickly realized, it was TEDIOUS to clean them! Dumping the dirt, knocking out the dust, rinsing off the foam sleeves... There HAD to be a BETTER WAY!

Now, Dr. Cork "Clean-it" Faubel has announced his new Breakthrough Incredible MIRACLE Labor-saving idea!

Dr. Cork explains his IDEA:
"I needed to vacuum, and was confused about the operation of the machine. It did not resemble any of the sharp manly power tools I'm used to handling with one hand tied behind my back and my eyes shut! But I really needed to use the device, and so, with one hand behind my back and my eyes shut, I positioned it, turned it on and began to move it around."

Dr. Cork continues:
"Something didn't quite look right as I operated it, but I didn't quite realize the stroke of serendipity I'd created until I read my wife's instructions on how to install the cup and filter system. At the time, she was still using the time-sucking 'filter cleaning, cup dumping' system. And then I realized, I DON'T HAVE TO CLEAN OUT THE FILTER! I'd instantly gained at least 15 minutes in my day. 

More from Dr. Cork:
"I thought about that FREE fifteen minutes I now had. I could drink a bottle of GINGER-ALE while putting my feet up! I could check FACEBOOK! I could read my COMICS! I could eat a bowl of TORTILLA CHIPS while checking my news feed! In fact I was so excited that I used up the time just by thinking about what I could do with it. But that's ok, because now I know that I can use my MIRACLE Labor-Saving FANTASTIC idea any time I want, gaining a FREE fifteen minutes with EACH USE!!!

SCIENTISTS have taken note. They have asked Dr. Cork, WHERE, exactly, does the dirt and pet hair GO after using this LABOR-SAVING idea? Dr. Cork's answer? He shrugs:
"I don't know. All I know is that the dirt isn't where I didn't want it a minute ago.'

Dr. Cork elaborates:
"Some folks have compared this operation to what you'd get with a snowblower, and I can see that, though I haven't had that experience myself. Again, just like with a snowblower, you have cleared the area in question, which is a fully-qualified YES for an endorsement on this WONDERFUL idea!"

HOW can you benefit from this GROUNDBREAKING idea? For complete instructions, just send ONLY .99 cents (plus $9.99 S&H)  to Dr. Cork, in care of this blog.

SATISFACTION GUARANTEED!

Tuesday, June 4, 2013

Caribou Lake Trail Backpacking Trip, Pt. 3


Rain during the night on a backpacking trip is usually noticed first by the drumming noise on the tent fly. "Whaaa?" groggily you come awake and then when you realize what it is, you have the "Oh Bummer!" moment. 

What did I leave out to get soaked or messed up? (sigh) But not tonight! No, my first thought was that no reasonable bear would be out roaming around looking for helpless backpackers to maul in the rain. And I knew that great minds thought alike when my tentmate, Loreleigh, said the same thing to me the next morning.

It seemed to me like it drizzled and showered all night long, but my pack was in a garbage bag and under the fly in the vestibule. My wonderful REI tent was dry inside, and my food was safely in odor-lock sacks in a dry-bag hanging from a low branch a hundred feet or so away. 

I rolled my padded bulk out of the sleeping bag and slid into my camp crocs. I didn't care if my socks got wet because I had a pair of dry ones, and this was our last day on the trail. I picked up the pair of little Hot Hands-type hand warmers I had thrown in the corner of the tent during the night. They were still a little warm. These were a perfect example of why you should NEVER go to sleep with them in your socks against your bare feet. I had them in my curled up hands as I dozed off, but they became HOT! Very hot. I could hardly handle them. I was afraid they would melt the nylon floor of my tent. I have had them barely get above ambient temperature in the past, but these were astounding.

I shed a couple of layers, pulled on my raincoat and stepped out to survey our camp. Everything looked undisturbed. I could say that it was a bit of a disappointment after all the preparations the night before, but I WON'T! I was glad and relieved. (OK, just a wee bit disappointed that there were no paw prints or scrapes to write about.)

Coffee was first on my agenda. I lowered my bag and pulled out my Via packet. After a quick little set-up, my butane-fired water was boiling and I was pouring and drinking my wake-up beverage. The others straggled out of the tents, looking around and also noticing no bear sign. We congratulated ourselves, especially on the fact that we hadn't done all those bear safety things on the trip for nothing!

I was stirring boiling water into my cup of herbed mashed potato flakes when Melinda gamely hauled out her armload of tinfoil and her Fancy Feast can and bottle of alcohol. We found a dryish, flatish rock sort of protected by any breezes. 

I gave my piece of windscreen tinfoil to Loreleigh for her stove so she would stop using my Crazy Creek chair for a windscreen. 

Not easy to hold a big stainless steel pot on top of a 2" cat food can punched full of holes and full of flaming invisible alcohol with one hand, and wave a fold-up chair a few inches away in the other hand.


I laid my stove and lighter nearby, casually remarked that there was still a little fuel left (I didn't want to insult anyone by suggesting that they should give up their systems) and again enjoyed the show with my meal.

Now one thing to realize is that Melinda counted out every fraction of an ounce for this trip. She measured exactly the weight of fuel that she calculated would be needed, about 2/3 of a plastic water bottle. As her water approached an almost near simmer, the flame went out. Too much extra fuel was used to fight the low temps and light breeze. One quick blast of my Brunton, and she had boiling water for coffee and breakfast.


In spite of the drawbacks, the Fancy Feast stoves are actually pretty clever and easy to use. In an emergency, they could warm up or cook your food for you. They are pretty lightweight and disposable. But I think a option that has been overlooked is experimenting with high octane grain alcohols instead of denatured alcohol. Just for emergencies, you know.


It did take us about 25 minutes longer to pack up in the rain than we had planned on. It was nice though, to just cram the wet stuff in, since we'd be unloading it soon. We stepped out a 9:25 am. It was Monday, Memorial Day. 

I was pretty surprised that no one had camped in the meadow last night, and no one seemed to be out on the trail at the same time we were. We saw no one the whole way down.

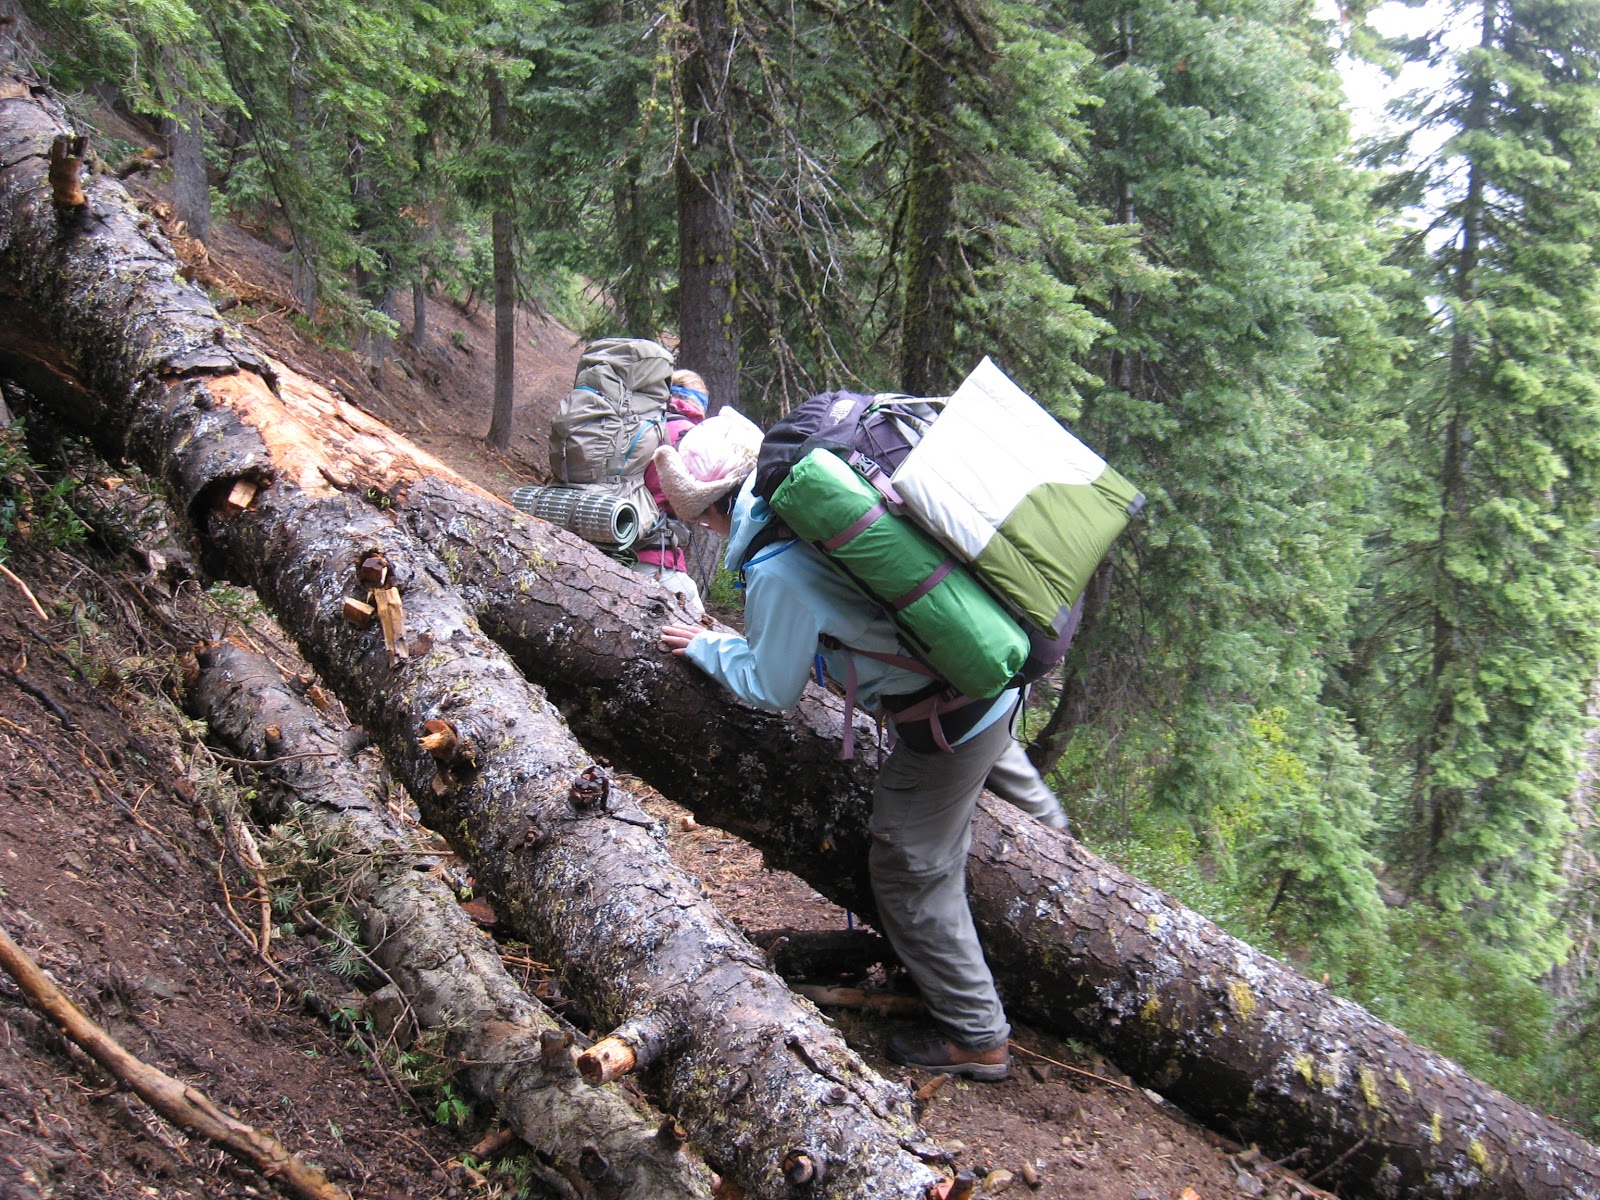
The clouds looked just like smoke from a fire! Coming into the burnt forest, we were unsure of just where that burned tree was blocking the trail. I wasn't looking forward to going around it, but hoping that the moist earth would be easier to climb on than the loose fluff of the other day. Finally, when we got to the granite side of the mountain, we had to realize that while we were gone, they must have drug it off the trail. It was definitely a "stock-stopper." But there were plenty of other downed trees and branches to get over.


It drizzled off and on all the rest of the way. The hood on my raincoat went up, and then down. Up and then down. 

Time for a quick self-portrait. I look a little startled and worse for wear!

It is a wonderful raincoat. REI brand and made of that lightweight breatheable material. It also has zippered vents under the arms to help with sweatiness.

More water was flowing across the granite face of the mountain and running in streams down the trail and the cut steps. It was beautiful and clear and set off the black flecked white granite in a beautiful way.

 I loved the look and sound of the run off.

Caribou Meadow in the rain. No lunch stop today.

The best thing about day 3? Downhill, all the way! Yay! I'd been looking forward to this ever since it had been uphill all the way. The last obstacle was the Salmon River to ford. It did seem a little higher than before, but still below the knees. Loreleigh and I didn't want to soak our hiking boots, so we changed into our crocs.

Icy cold, and a little swift, but not too bad, as I didn't fall in.

The last uphill slog to the parking area at the trailhead, and there was our driver, waiting for us. Even though at first he acted like he didn't see us coming so he could finish the chapter on his audiobook, we we were glad to see him. 12:25 pm, just 25 minutes off our scheduled plans!

We passed a celebratory beer, Deschutes Red Chair, and drove down to Weaverville for Subway sandwiches.