Thursday, January 9, 2014

Brew Tips - Bottle Washer

First off, ignore the ugly, stained laundry tub. Thanks! Now let's look at my clever little bottle washer.

When you bottle your homebrew instead of kegging it, there are a lot of bottles involved. Lots of bottles. Five gallons of homebrew can fill several cases of bottles, especially if you want to fill some 12 ouncers along with the larger 22 ounce size. To prepare previously used beer bottles for filling requires a couple steps, and the most tedious is washing and rinsing them.

If there are labels, or if a residue of any sort remains inside the bottles, they must be washed with something like Oxy Clean or PBW, a highly effective powdered brewers cleaner. The stuff is like magic, melting the labels right off and stripping the gunk out of the insides. It also doesn't foam much, so rinsing is easier. But the rinsing must indeed happen, and this is where most of the tedium occurs.

You can drop the bottles into a big tub of water and try to get them to sink and fill with clear water. Swirl the water, turn the bottles upside down and watch the water glug glug out. Circle the bottle rapidly to create a whirlpool inside so the water will shoot out quicker, but notice how the centrifugal force also pins the draining water to the inside wall. Is it rinsed enough? Better rinse it again to make sure there isn't any cleaner remaining!

After the 10th time, I knew I MUST have a bottle rinser of some kind and applied myself to coming up with a simple solution. I put together three simple items, two of which I already had, and now I have a very effective rinsing tool.


I bought a brass dishwasher connector from Home Depot. Perhaps because of its wide use, it was about the cheapest fixture on the brass fittings wall at the store, only about three bucks. I used an extra Starbucks straw from a Venti size reusable cup for the tube. The little rim at the bottom of the straw is perfect for holding it in place. Feed the straw through the compression fitting that comes with the connector, and then the nut, and hand tighten it onto the connector.

Use a basic plastic or metal hand-held sprayer that has garden hose threads on the spray end. That will be where you screw on the female end of the dishwasher fitting. The other end of the sprayer will fit on a hose or a laundry tub spigot. What is nice about the laundry tub is that I can easily use hot water, and I don't have to try to figure out how to hold a hose in place.

Turn the water on part way, and just hold the soapy bottle upside down over the straw. squeeze the spray handle and water will shoot up inside the bottle, quickly and neatly draining itself at the same time!


Tuesday, January 7, 2014

Organizing My Spices


You'd think I'm crazy to get this much pleasure out of organizing my spices, but it's true! I'm giddy with satisfaction and pleasure at viewing all the little powders and dried things tucked away, each in their own matching jars. It has been a long time coming.

There are so many ways to handle the kitchen spices. When I was younger, spices mostly came in little tin boxes, red and white with the Schilling brand stamped on them. We had them stacked like tiny books in a lower kitchen cupboard. Their snap tops were plastic and had a scooping side and a shaker side. If you went back a little further in years, the tops were also tin, and they slid back and forth over an oval hole in the top of the can. This more ancient style resided in my grandmother's cupboard, who probably never heard of spices getting old and probably wouldn't have been able to bear to throw them away if she had. The tin boxes were great for keeping light out, good for keeping moisture out and easy to line up on a shelf. It was a drawback to not be able to see how much was left though, or to know what might be inside without actually reading the can.

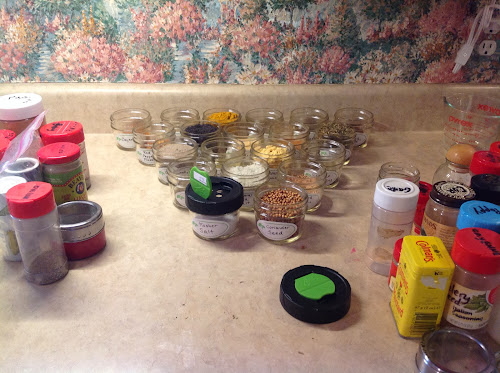
Eventually, we went to keeping the spices in a shallow drawer, which worked very well. I used that method when I got my own house. Except by now, more and more spices were coming in an assortment of plastic bottles. I bought the bottles based on whether they would fit in my spice drawer. I laid the tall ones down, I Sharpied the names on the red lids of the small bottles and set them upright. Bulk spices started to become available. As I repurposed bottles, I had to cross out one name and write another. It sort of became a jumble with older ingredients at the back of the drawer where they weren't easily in view.

At my new house, I didn't have a drawer I could give over to the spices, so I used a basket in a lower cupboard. Finally, I'd had enough of that pile of old and new mismatched bottles piled up in the plastic basket and started looking for a new way. I looked through Amazon for glass spice bottles. I didn't want the staining and odor retention of plastic anymore.

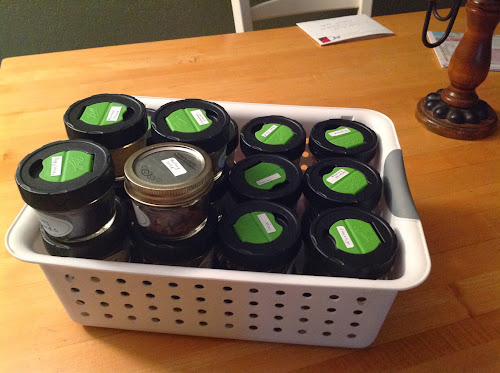
When I came across Ball brand 4 oz jars with a standard size lid opening, something I had not known existed, I knew I'd found exactly what I wanted! They happened to be available at Walmart, and for only a little more than a dollar a jar. These came with a plastic lid with a snap shaker top incorporated, though I could have gotten some at Target with the regular style lids. The standard lid size was important to me, and I was vindicated when I saw that one of my plastic lids was broken, and I had to dig out a standard canning lid to cap my mulling spices. (I had dropped one of the boxes of four jars and suspect that was when it happened.)


I jumped in all the way and bought over two dozen of them. I wanted enough for all my herbs and spices. And I know where to get more!


These jars stack in my basket perfectly, and I keep them in the lower cupboard where light can't get to them.

I love to use canning jars for lots of things. In all their sizes and shapes they are good for left-overs, making tea, storing pantry ingredients, sending Kefir in someone's lunch kit, and now, finally, a size perfect for spices and herbs!